


Master The Art Of OTG Baking: A Complete Guide To Cakes, Breads, And Pizzas
Master OTG baking at home with this complete guide to cakes, breads, and pizzas—learn temperature control, heat modes, tools, and pro tips for perfect results.

Baking is often described as a science, but when you’re standing in your kitchen with an Oven Toaster Griller (OTG), it feels much more like an art form. Whether you have a compact 9 Litre for quick snacks, a versatile 25 Litre for family dinners, or the professional-grade 48 Litre for large batches, mastering your OTG is the secret to bakery-quality results at home.
In this guide, we’ll demystify the knobs, the heating elements, and the "why" behind the "how." From the fluffiest sponges to the crunchiest pizza crusts, here is your definitive roadmap to OTG excellence.
- Understanding Your Tool
Before we crack an egg, let's understand your machine. Unlike a microwave convection oven, an OTG uses electric coils to generate heat and a fan (in larger models) to circulate it.
| Model Size | Best Suited For | Key Feature |
| Singles/Couples, Toasting, Small Batches | Rapid heating, space-saving. | |
| Small Families, 1kg Cakes, 10" Pizzas | Balanced heat, includes rotisserie. | |
| Home Bakers, Large Pizzas, Sourdough | Convection fan for even browning. |
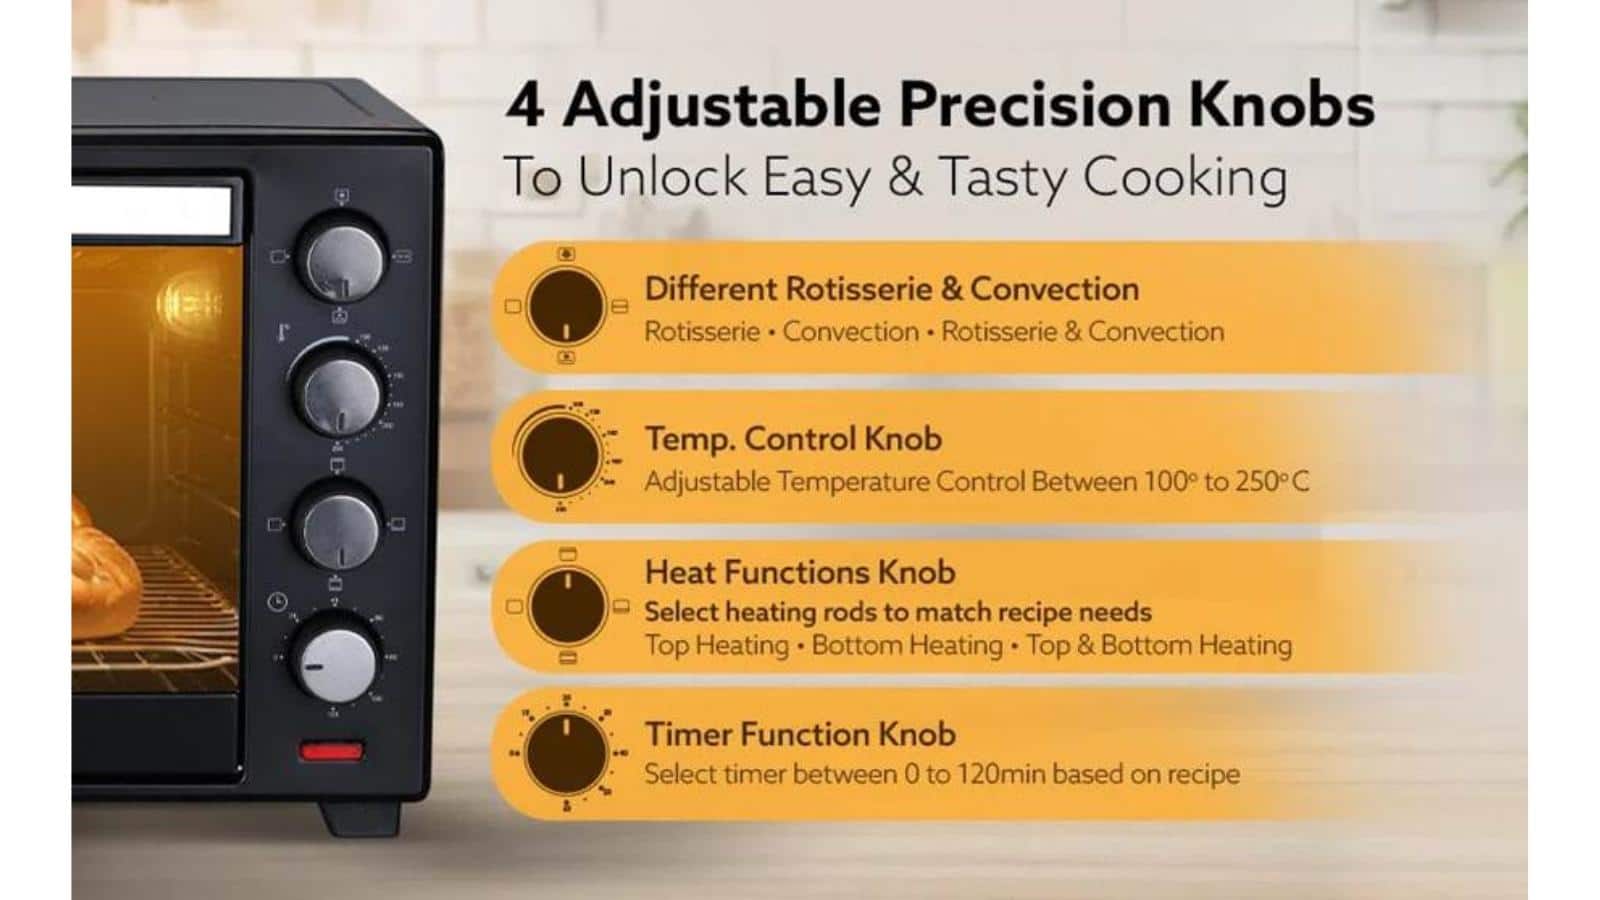
The Three Golden Knobs
- Temperature: Usually ranges from 100°C to 250°C.
- Selector (Mode): This controls which coils are on (Top, Bottom, or Both).
- Timer: The shut-off mechanism. Always preheat for at least 10–15 minutes.
- Essential Baking Utensils for OTG
Using the right "hardware" is just as important as the recipe.
- Aluminium Tins: Best for cakes. They conduct heat quickly and evenly.
- Dark/Non-stick Pans: Great for breads and pizzas as they absorb more heat, leading to a crispier crust.
- Glass (Borosil): Safe, but takes longer to heat up. Avoid sudden temperature changes.
- Wire Rack: Essential for air circulation.
- Baking Tray: Used for cookies, pizzas, and as a drip tray when grilling.
- Step-by-Step: Baking the Perfect Cake
The biggest challenge in an OTG is preventing the top from burning while the middle stays raw.
The Process:
- Prep: Grease your tin and line it with parchment paper.
- Preheat: Set your AGARO OTG to 180°C with Both Elements ON for 15 minutes.
- Position: Place the cake tin on the middle rack.
- Settings: * Mode: Shift to Bottom Element ONLY for the first 20 minutes. This pushes the cake up (rise).
- Final Touch: For the last 5–10 minutes, turn Both Elements ON to brown the top.
- The Skewer Test: Insert a toothpick; if it comes out clean, you're done!
Pro Tip: If the top is browning too fast, loosely cover the tin with aluminium foil.
- Step-by-Step: Artisanal Breads and Buns
Bread requires a humid environment and high initial heat to get that "oven spring."
The Process:
- Proofing: Ensure your dough has doubled in size before entering the oven.
- Preheat: Set to 200°C - 220°C with Both Elements ON.
- Steam Hack: Place a small oven-safe bowl of water on the bottom floor of the OTG. This creates steam, keeping the crust soft enough to expand.
- Baking: Place the loaf on the middle rack. Bake for 25–30 minutes.
- The Hollow Sound: Tap the bottom of the bread; if it sounds hollow, it's perfectly baked.
Most Suitable for AGARO 48L: Use the Convection mode (fan) for breads to ensure the crust is golden all the way around.
- Step-by-Step: The Ultimate Home-Style Pizza
The goal for pizza is a scorched, crispy base and bubbly cheese.
The Process:
- The Tray: Use the specialised pizza tray provided with your AGARO Marvel or a preheated baking stone.
- Preheat: Crank your OTG to its Maximum Temperature (230°C-250°C).
- Settings: Both Elements ON.
- Placement: Place the tray on the top rack if you like charred toppings, or the middle rack for a more even cook.
- Timing: Pizza cooks fast! It usually takes 8–12 minutes. Watch for the cheese to start browning.
- Understanding Heat Modes (The Secret Sauce)
| Mode Icon | What it does | When to use |
| Top Line | Top Element Only | Grilling, Browning cheese, Toasting bread. |
| Bottom Line | Bottom Element Only | Baking cakes (initial stage), Thin crust pastry. |
| Both Lines | Top & Bottom Elements | Standard Baking (Pizza, Cookies, Breads). |
| Fan Icon | Convection | Multi-level baking, Crispy snacks, Even browning. |
- Troubleshooting Common OTG Issues
- Cake Sinks in the Middle: You likely opened the door too early, causing a temperature drop, or used too much leavening agent.
- Bottom is Burnt, Top is Raw: Your tray is too low. Move it to the middle rack and ensure you aren't using the "Bottom Only" mode for the entire duration.
- Uneven Browning: In smaller 9L or 25L models, heat can be intense near the coils. Rotate your pan 180 degrees halfway through the baking time.
- Dry Cakes: You are likely over-baking. Check 5 minutes before the recipe time ends.
- Maintenance and Safety Tips
To keep your AGARO Marvel OTG performing like new:
- Cooling Down: Never clean the OTG while it's hot. Let it reach room temperature.
- The Crumb Tray: Always slide out the crumb tray and clean it after every session to prevent smoke and "burnt" smells.
- Avoid Water on Glass: Never spray water on the hot glass door; it can shatter due to thermal shock.
- Wire Management: Ensure the cord isn't touching the back of the oven, as that area gets extremely hot.
- Why Choose AGARO Marvelfor Your Kitchen?
The AGARO Marvel series is designed with the Indian kitchen in mind.
- Precision: The thermostats are calibrated for accuracy, which is vital for delicate recipes like macarons or cheesecakes.
- Durability: The heat-resistant tempered glass and heavy-duty heating coils can handle long hours of sourdough baking.
- Accessories: Unlike many brands, AGARO provides a complete kit (Baking tray, wire rack, tray handle, and rotisserie), saving you the extra expense.
Conclusion: Your Journey Starts Here
Baking in an OTG is a rewarding experience that fills your home with the incomparable aroma of fresh yeast and vanilla. Start with something simple—perhaps a basic vanilla sponge or a margherita pizza. As you get to know the "hot spots" of your specific oven, you'll gain the confidence to experiment with complex pastries and roasts.
Remember: every oven has a personality. Don't be discouraged by a burnt cookie or a sunken cake; they are just stepping stones to becoming a master baker.
Disclaimer: This is a sponsored article. ABP Network Pvt. Ltd. and/or ABP Live does not in any manner whatsoever endorse/subscribe to the contents of this article and/or views expressed herein. Reader discretion is advised.


